

Projects: Open-access Guitar Pedal Development - Software (Building a Tremolo Effect)
Overview
As part of our ongoing EGIL FX Kit efforts, the goal of this student project was to create a video guide to developing effects that can, later, be embedded on micocontrollers (and in pedals). The Electric Guitar Innovation Lab (EGIL) at WPI has prepared a Digital FX Pedal Kit and a Digital FX Testing Rig to support these efforts, and, through this project and this webpage, we seek to create an open-access multimedia resource that describes how to create audio effects in a stompbox-style pedal from scratch. This guide, developed by EGIL undergraduate students in 2021, assumes the reader has no prerequisite knowledge of software development and only the desire to learn.
This EGIL website series was developed by students and this guide on Digital FX Pedals includes:
1) this software overview explaining how digital effects can be programmed (using the Max/Gen programming language
2) a hardware overview guide explaining how to assemble a pedal (microcontroller, potentiometers, jacks, etc.)
3) links to other resources for further study
Getting Started
-Download/unzip or clone the file repository for this project; the FX Development Rig: Overview video demonstrates how this software tool can facilitate effect development
-Download/install/open the Max/Gen programming language
-Here is a more thorough introduction to the Max programming language. The guide below will help you quickly implement a tremolo circuit (as you might see depicted in a DSP book) in the Max environment by using our FX Testing Rig.
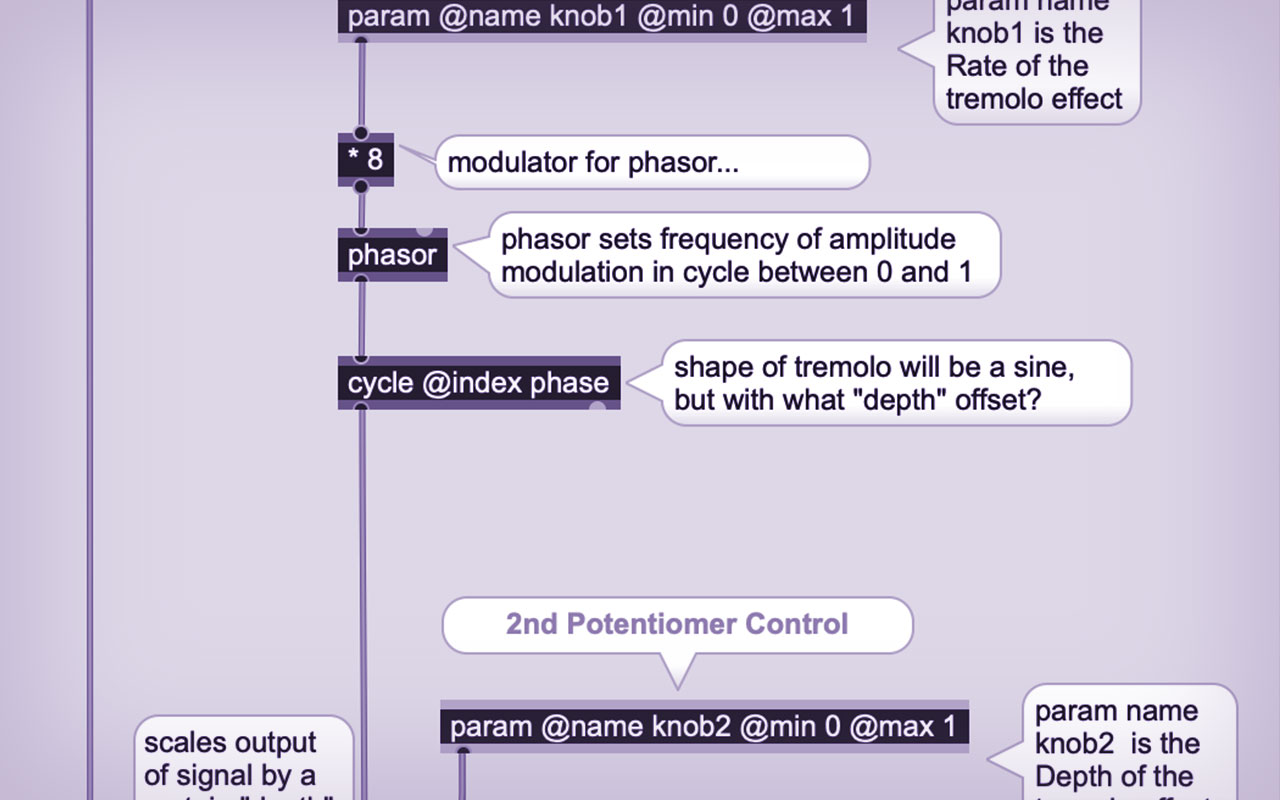
Building a Tremolo Effect
-Click the "Open Contents of Gen" button in the FX Testing Rig
-Unlock the patch and remove all objects except the "in" and "out" objects
-Follow along with the video tutorial or text tutorial
Getting Ready to Push Your Code to the Pedal
Once you build your pedal as described in our hardware overview , you'll be ready to push the software you've written to the pedal's microcontroller:
Follow the steps here to do the following:
-Install the Daisy Toolchain
-Install Max
-Install our custom Electro-smith "Oopsy" package for Max
Prep the Pedal to Receive Code
-Connect your pedal/microcontroller to your computer
-On the microcontroller, hold the "Boot" button down while you press and release the "Reset" button
-When you release the "Boot" button, the Daisy will be in DFU mode and will be capable of receiving the contents of your Gen patch as new firmware
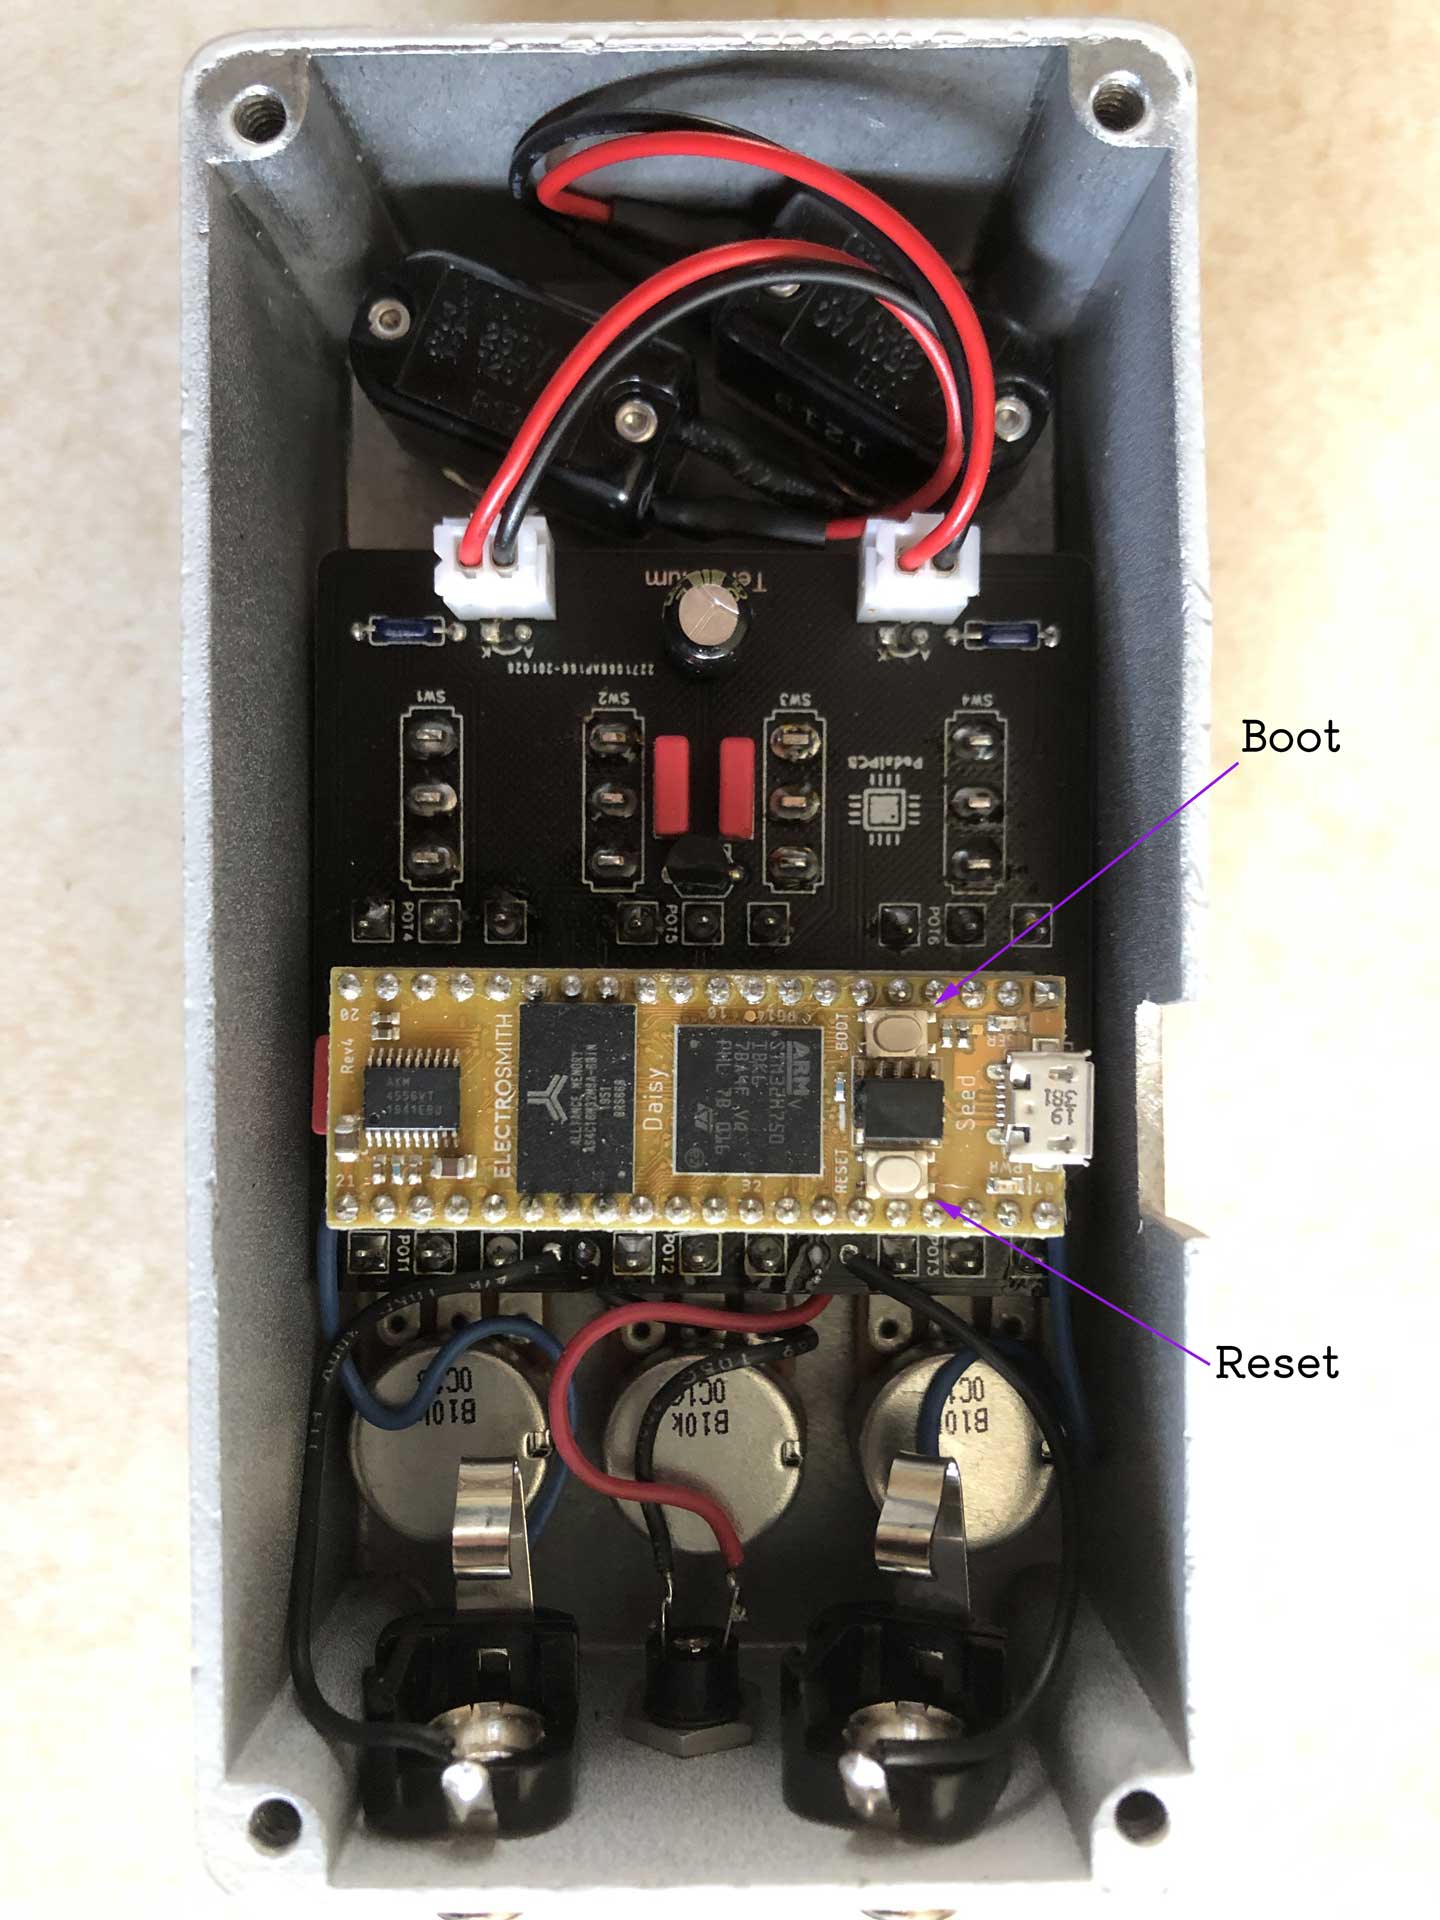 Microcontroller in an enclosure
Push Your Code to the Pedal
-Select the appropriate PCB profile from the dropdown menu
-Push the small circular button at the left or click "Export Code to C/C++"
-Click the "Message Console" button to view progress as the firmware is sent to the microcontroller; when it has completed, the pedal will retain that firmware and, when powered, be ready for use without being connected to a computer.
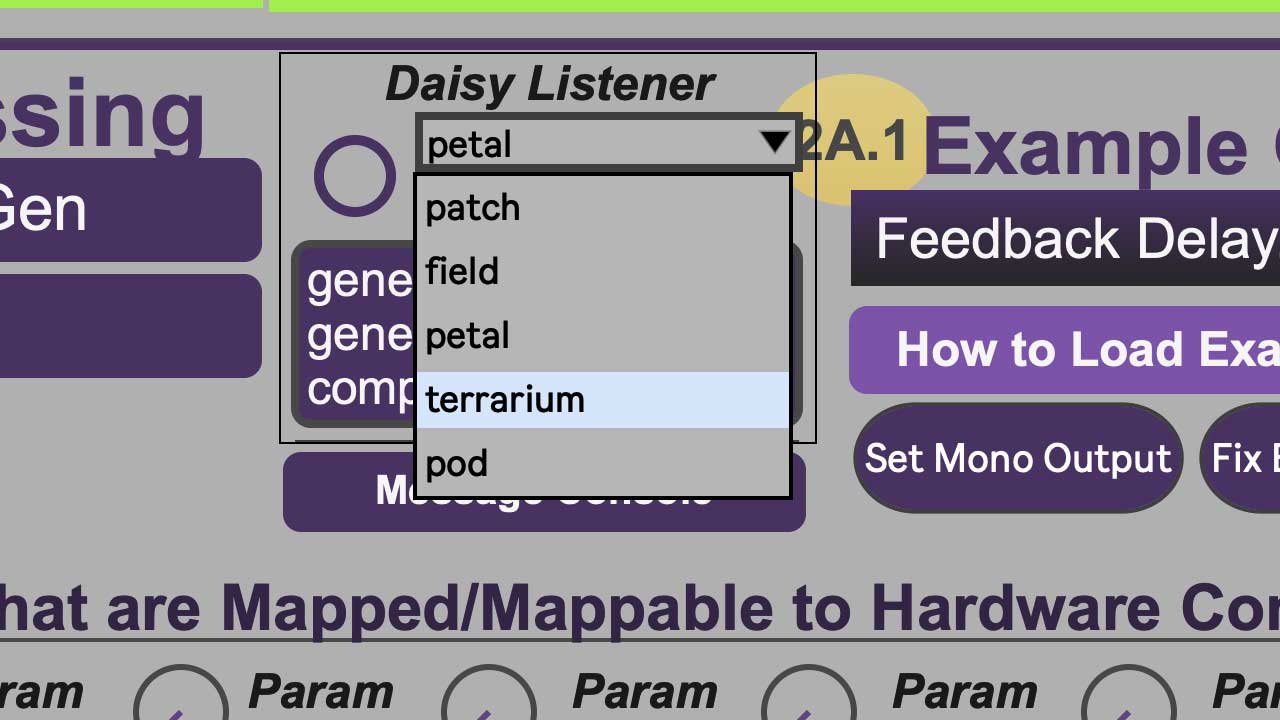 PCB-type selected from dropdown menu
Recommended Reading
To aid in future development, we recommend:
If you are new to Max programming
-the five "MSP Basics Tutorials" built into Max (File>Show File Browser, click the '74 "Cycling '74 Content' icon, select Tutorials>MSP>Tutorials
If you are new to digital signal processing (DSP):
-Audio Processes by David Creasy, chapters 1-12
Project Personnel
V.J. Manzo, Founding Director and PI of the Electric Guitar Innovation Lab; PI, WPI Faculty
Ryan McKenna, WPI alumnus and Research Associate for the Electric Guitar Innovation Lab; Technical Advisor
Imogen Barnes, WPI undergraduate student and co-creator of this guide
Allie Rozear, WPI undergraduate student and co-creator of this guide
![]()
Special thanks to:
-Steve Holec for commissioning this open-access article and supporting Imogen and Allie's efforts!